
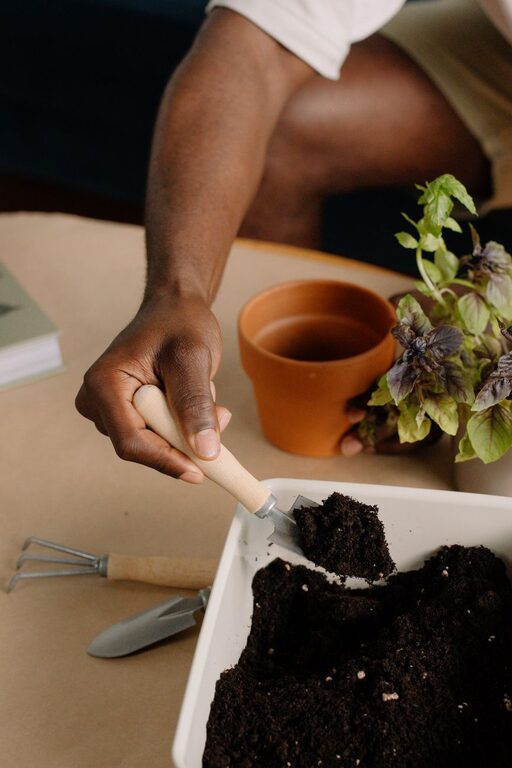
Starting a small herb garden indoors is a fantastic way to enjoy fresh herbs year-round, even if you don’t have outdoor space. Whether you want to add flavor to your meals or simply enjoy the greenery, growing herbs inside is both practical and enjoyable. This guide will walk you through everything you need to know to create your own thriving indoor herb garden.
Why Grow Herbs Indoors?
Indoor herb gardening offers several benefits:
– Fresh herbs anytime: Access to fresh ingredients for cooking without needing to shop frequently.
– Space-saving: Perfect for apartments or homes without outdoor gardens.
– Improves air quality: Many herbs help purify indoor air.
– Therapeutic benefits: Gardening can be relaxing and boost your mood.
Now, let’s get started on how to set up your herb garden step by step.
Choosing the Right Herbs for Indoor Growing
Not all herbs thrive indoors, so pick varieties known to do well inside. Some great beginner-friendly options include:
– Basil
– Parsley
– Chives
– Mint
– Thyme
– Rosemary
– Oregano
– Cilantro (coriander)
These herbs are relatively low-maintenance and can tolerate indoor conditions. Consider your cooking preferences to select herbs you will use regularly.
What You’ll Need to Start
Gather these materials before planting:
– Containers: Pots with drainage holes. You can use individual pots or a shared planter.
– Potting mix: Use a high-quality, well-draining potting soil designed for indoor plants.
– Seeds or seedlings: Seeds are economical but take longer. Seedlings allow faster results.
– Light source: A sunny south-facing window or grow lights if natural light is limited.
– Watering tools: A small watering can or spray bottle.
– Labels: To keep track of which herb is which, especially when starting from seeds.
Step-by-Step Guide to Plant Your Herb Garden
1. Choose a Location
Most herbs need 6-8 hours of sunlight daily. A bright window sill or kitchen counter near a window works well. If natural light is insufficient, consider investing in a grow light with a timer.
2. Prepare Your Containers
Fill your pots with potting mix, leaving about an inch of space at the top for watering. Make sure the containers have drainage holes to prevent waterlogging.
3. Plant Seeds or Seedlings
– Seeds: Follow packet instructions for planting depth. Generally, plant seeds about twice as deep as their size. Lightly cover with soil and gently water.
– Seedlings: Carefully remove the plant from its nursery container and transplant it into your pot. Firm the soil around the root ball.
4. Watering
Water the soil gently but thoroughly after planting. Keep the soil moist, but not soggy. Overwatering can lead to root rot. Using a spray bottle for seedlings can help prevent disturbing the soil.
5. Provide Adequate Light
Place your herb pots in the chosen spot. Rotate pots occasionally to ensure even light exposure and balanced growth.
6. Maintain Your Garden
– Water regularly: Check soil moisture frequently. Water when the top inch feels dry.
– Fertilize: Feed your herbs with a diluted, balanced liquid fertilizer every 4-6 weeks.
– Prune: Regularly pinch off dead or overgrown leaves. Harvesting encourages new growth.
Tips for Success
– Start small: Begin with 3-5 herb varieties to manage care easily.
– Use quality potting soil: Avoid using garden soil indoors.
– Monitor humidity: Indoor air can be dry, especially in winter. Misting your herbs occasionally can help.
– Watch for pests: Indoor plants can attract pests like aphids or spider mites. Wipe leaves with a damp cloth or use insecticidal soap if needed.
Troubleshooting Common Problems
– Leggy growth: Insufficient light causes herbs to stretch. Move plants to a brighter spot or provide grow lights.
– Yellow leaves: May indicate overwatering or lack of nutrients. Adjust water and fertilize as needed.
– Wilting: Could be underwatering, root bound pots, or poor drainage. Check soil moisture and pot size.
Harvesting and Using Your Herbs
Harvest herbs by snipping leaves or stems using clean scissors. Always leave enough foliage for the plant to continue growing. Use fresh herbs in salads, soups, sauces, or as garnish. You can also dry extra herbs for later use by hanging small bundles upside down in a dry, airy place.
Conclusion
Starting a small herb garden indoors is an enjoyable and practical project for any home. With a few supplies, some patience, and regular care, you can have fresh, flavorful herbs ready to enhance your cooking every day. Plus, the presence of green plants can brighten up your living space and promote a sense of well-being.
Happy gardening!